 Bellingham Siding
 What Bellingham's Coastal Climate Does to Siding in Columbia
Columbia sits close enough to Bellingham Bay and Whatcom Creek that homes here take on a specific mix of weather stress that inland Whatcom County neighborhoods don't deal with in the same combination. It's not one big storm that wears out a wall — it's the slow, year-round layering of salt-laden air, driving rain off the Sound, and long stretches of shade and dampness that never fully dry out. Siding that isn't built and installed for that combination shows it early: chalking paint, soft trim, streaking, and moss creeping up from the bottom courses.
Salt Air and Metal Fatigue
Proximity to open water means a steady low-level dose of salt in the air, even on days that feel perfectly dry. Salt is hard on exposed metal — fasteners, flashing, and trim hardware corrode faster here than they would twenty miles inland. It's also hard on paint film, which is why a lot of older siding in this part of Bellingham shows chalking and fading well before it should. This is a product and fastener question as much as an installation question: what the siding is made of and what it's fastened with matters as much as how carefully the crew works.
Driving Rain, Wind-Driven Moisture
Storms coming off the water don't just drop rain straight down — they push it sideways into walls, corners, and window returns. That kind of wind-driven rain finds every shortcut in a siding installation: gaps at butt joints, under-lapped courses, missing kick-out flashing at roof-to-wall intersections, caulk used in place of proper flashing. A home can look fine from the curb and still be taking on water behind the cladding.
The Long Moss and Mildew Season
Bellingham's moss season isn't really a season — it's most of the year. Shaded north and west walls in Columbia, especially those close to mature trees or neighboring structures, stay damp for days after a rain. That damp, low-light exposure is exactly what moss, algae, and mildew need to take hold. Siding with poor drainage behind it, or that traps moisture against the substrate, will grow a green film faster and hold rot longer once it starts.
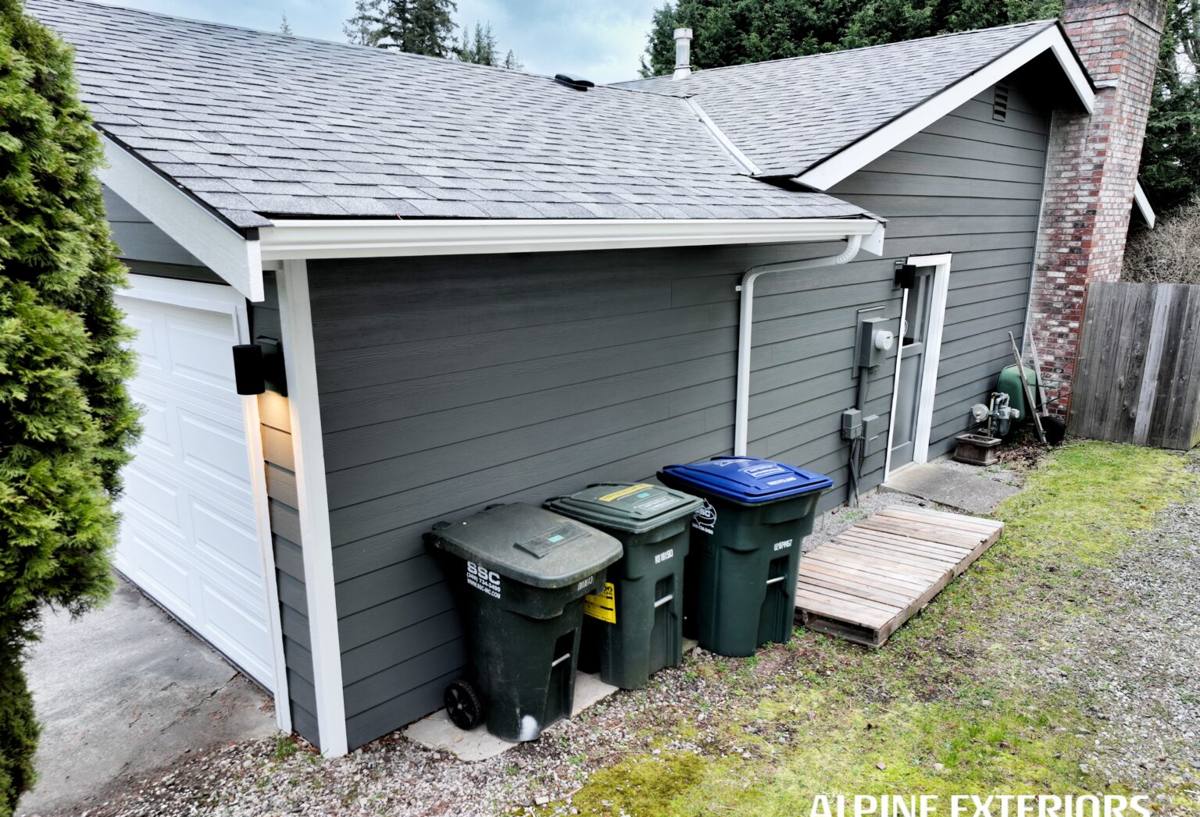
What a Correct Siding Installation Actually Involves
A siding job is judged on how it looks the day it's finished, but what actually determines how it performs over the next 20-30 years happens underneath — the parts nobody sees once the last course is up.
Water Management Behind the Cladding
Correct installation starts with a continuous weather-resistive barrier, properly lapped and taped at seams, with flashing integrated at every penetration, window, door, and roof-to-wall transition — not caulked over afterward. Where the wall assembly calls for it, a rainscreen gap or furring strip lets any water that does get past the siding drain and dry instead of sitting against the sheathing. This is the layer that decides whether Columbia's long wet stretches are a non-issue or a slow rot problem five years down the road.
Fastening, Fit, and Finish
Fiber cement siding has manufacturer-specified nailing patterns, minimum fastener embedment, and clearance requirements at grade, roof lines, and butt joints. Skip those specs — over-drive a nailer, face-nail where blind-nailing is called for, tuck siding too close to grade or a roof deck — and the manufacturer's warranty can be voided even though the product itself was never the problem. Correct trim work, caulking only where it belongs (not as a substitute for flashing), and factory-finished cut edges sealed properly all matter just as much as getting the reveal lines straight.
Why We Install Only James Hardie Fiber Cement
We don't install vinyl, LP SmartSide, Cemplank, Allura, or raw wood siding, and that's a deliberate standard, not a lack of options. James Hardie fiber cement is non-combustible, which matters in a region that sees wildfire smoke seasons and where insurers increasingly ask about exterior materials. It comes with a factory-applied ColorPlus finish that's baked on and warranted against fading and chipping in a way field-applied paint can't match. Hardie's HZ product lines are engineered specifically for Pacific Northwest moisture exposure, and the company backs installations with a strong, transferable warranty when the work is done to spec. We'd rather stand behind one product line we know inside and out than offer a menu of materials with different failure points, different warranty fine print, and different maintenance demands.
Our Siding Installation Process for Columbia Homes
The steps don't change much from house to house, but how carefully each one is done is what separates a job that lasts three decades from one that needs attention in five years.
- On-site assessment — we look at exposure (which walls take the worst weather), existing substrate condition, trim and window detailing, and any signs of past moisture damage before we ever talk product or price.
- Tear-off and sheathing inspection — old siding comes off and the sheathing underneath gets checked for soft spots, rot, or prior water damage. Anything compromised gets repaired before new material goes up; covering a bad substrate with new siding just hides the problem.
- Weather-resistive barrier and flashing — a continuous, properly lapped barrier goes on, with flashing detailed at every window, door, and roof intersection.
- Hardie installation — lap siding, panel, or shingle profile installed to manufacturer nailing and clearance specs, with attention to reveal consistency and joint placement.
- Trim, caulking, and touch-up — corners and trim finished, factory-cut edges sealed, and any field touch-up done with Hardie-matched product.
- Final walk-through — we go over the finished exterior with the homeowner before calling the job done.
Signs a Columbia Home Needs New Siding
Some of these show up fast; others take years to become obvious. Worth checking for, especially on walls that stay shaded or face the water:
- Soft or spongy spots when you press on siding, especially near the bottom courses or under windows
- Persistent moss, algae, or dark streaking that comes back within weeks of cleaning
- Paint that's chalking, peeling, or fading unevenly across different walls
- Visible warping, buckling, or gaps opening up between boards or panels
- Rising energy bills with no other explanation — a sign the wall assembly may no longer be sealing properly
- Rot or damage visible at corners, trim boards, or anywhere siding meets a roofline
- Interior signs like peeling paint or musty smells along exterior walls
What Siding Installation Costs in Columbia
Every home is different, but the main variables that move the price are consistent. We give real numbers on-site after seeing the house — this is meant to explain what drives the range, not to substitute for an estimate.
| Cost Factor | Why It Matters |
|---|---|
| Home size and wall complexity | More square footage and more corners, dormers, and roof intersections mean more material and more labor-intensive flashing detail |
| Tear-off and disposal | Removing and hauling old siding (especially old wood or damaged material) adds time and disposal cost before new material even starts |
| Substrate repair | Any rotted sheathing, framing, or trim found during tear-off needs to be fixed first — this is the most common source of surprises |
| Siding profile chosen | Lap siding, shingle-style panels, and vertical panel systems differ in material and installation labor |
| Trim and accent detail | Custom trim widths, board-and-batten accents, and color-matched fascia add finish work beyond the field siding |
| Access and site conditions | Tight lots, mature landscaping, and multi-story walls affect scaffolding and staging needs |
Why a Crew That Already Works in Columbia Matters
Columbia has a real mix of home ages and styles — older homes with original wood-frame construction sitting alongside more recent remodels — and each era comes with its own quirks under the siding: board sheathing with gaps, older flashing details that don't meet current standards, or additions where two different wall assemblies meet. A crew that's worked this neighborhood before knows to expect those conditions instead of discovering them mid-project. There's also the practical side: familiarity with Bellingham's permitting process, an understanding of how close-set lots affect staging and material delivery, and a feel for which walls in this specific pocket of the city take the worst of the wind and rain off the water. That local pattern-recognition is what keeps a project on schedule and keeps surprises to the ones that genuinely couldn't have been predicted.
Caring for Hardie Siding After Installation
Fiber cement is low-maintenance compared to wood or vinyl, but "low-maintenance" isn't "no-maintenance," especially in Whatcom County's wet climate. A periodic rinse-down (garden hose pressure, not a pressure washer aimed directly at seams) keeps moss and grime from building up on shaded walls. Gutters and downspouts should stay clear so water isn't sheeting down the siding face during heavy rain. Caulking at trim joints is worth a visual check every year or two, since caulk failure — not the siding itself — is the most common source of small leaks. Following Hardie's maintenance guidance keeps the warranty intact and keeps the finish looking like it did on install day for years longer.
If you're seeing any of the warning signs above, or you're just planning ahead for a home in Columbia, we're happy to walk the exterior with you and give a straight assessment — no pressure, no upsell, just what the house actually needs. Use the form below to request a free estimate.